

Introducing Calls: Combine Chat, Video and Screen Sharing
Diesen Beitrag auf Deutsch lesen.
We're thrilled to announce a feature that many of you have been asking about for a long time: the ability to do video calls and screen sharing with your customers.
We already offered Audio Calls . Now that we've added the following video and screen sharing features, we'll simply refer to this whole set of features as Calls.
Let's take a look at how they work!
1
Starting a call
Calls are available from the Corporate plan onwards. In the screenshot below, we are in the Message Center, having a conversation with a customer. To start a call –audio or video– you click on the telephone icon in the command bar.
Only operators can initiate a call; contacts cannot. This is because unlike chats, operators can't handle more than one call at once. Which is also why, when starting a call, the operator won't receive any new conversations.
To make switching to a call easier, we recommend setting up a chat macro that suggests the switch to the customer.
Once you’ve started a call, your contact can choose to accept or deny it from the Website Messenger.
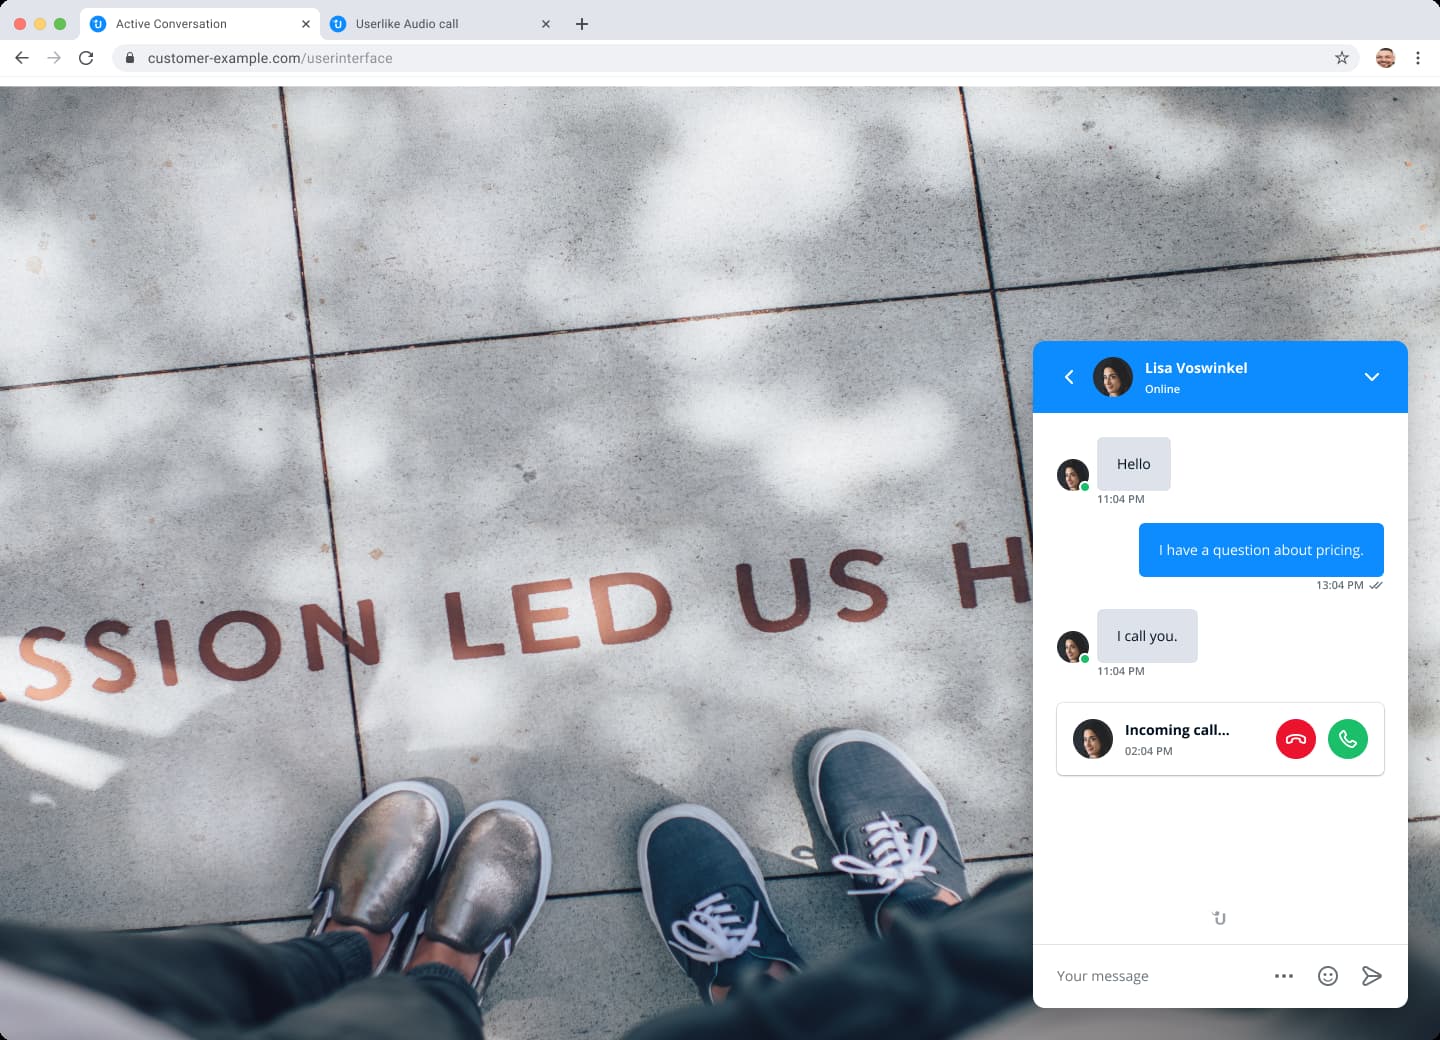
When they accept, a new audio call tab opens for the operator. For your contact, a new dedicated browser tab opens up as well.
These new tabs mean that you and your contact can continue messaging on the old tab while you’re on a call. While on a call, you might mention a relevant URL. You can use the chat to send the relevant link over immediately, so your contact can check it after or even during the call.
The other benefit of the double tab setup is that it allows your customers to keep on browsing your website while they're still talking with you.
For the design of the Call tab, we've taken inspiration from solutions like Zoom, Slack, Teams, etc. The past two years have made everyone plenty familiar with these tools, which should make things intuitive for both your team and customers.
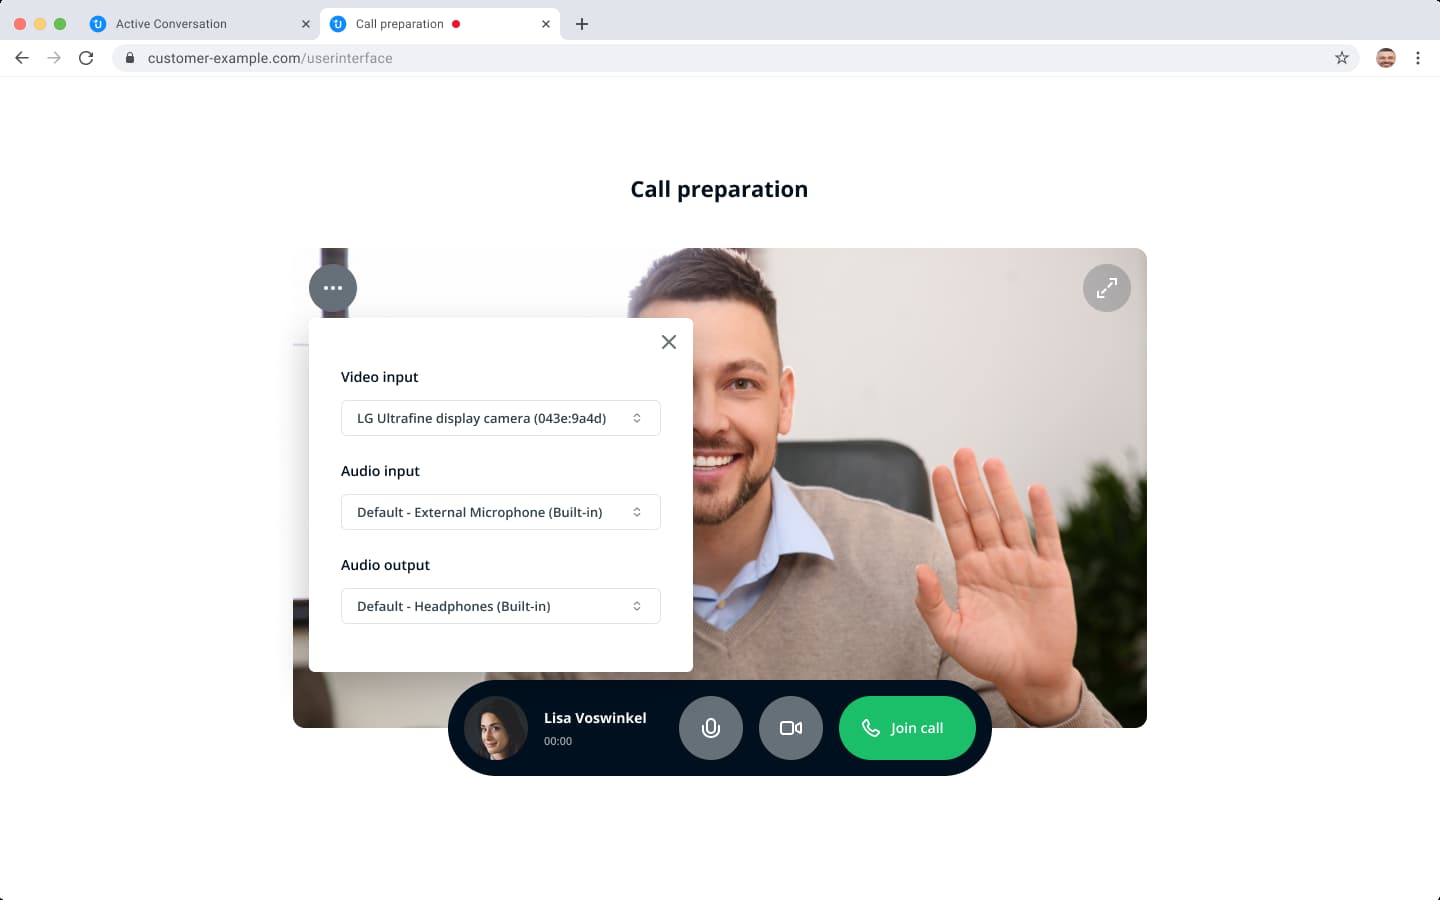
In the new Call tabs, the Operator and the contact both enter a short call preparation stage before the call kicks off, during which they can activate their camera or limit things to audio.
For businesses selling physical products, it's interesting to note that they could select a video input device that allows them to showcase their products – for example, to give a digital tour of a car or house.
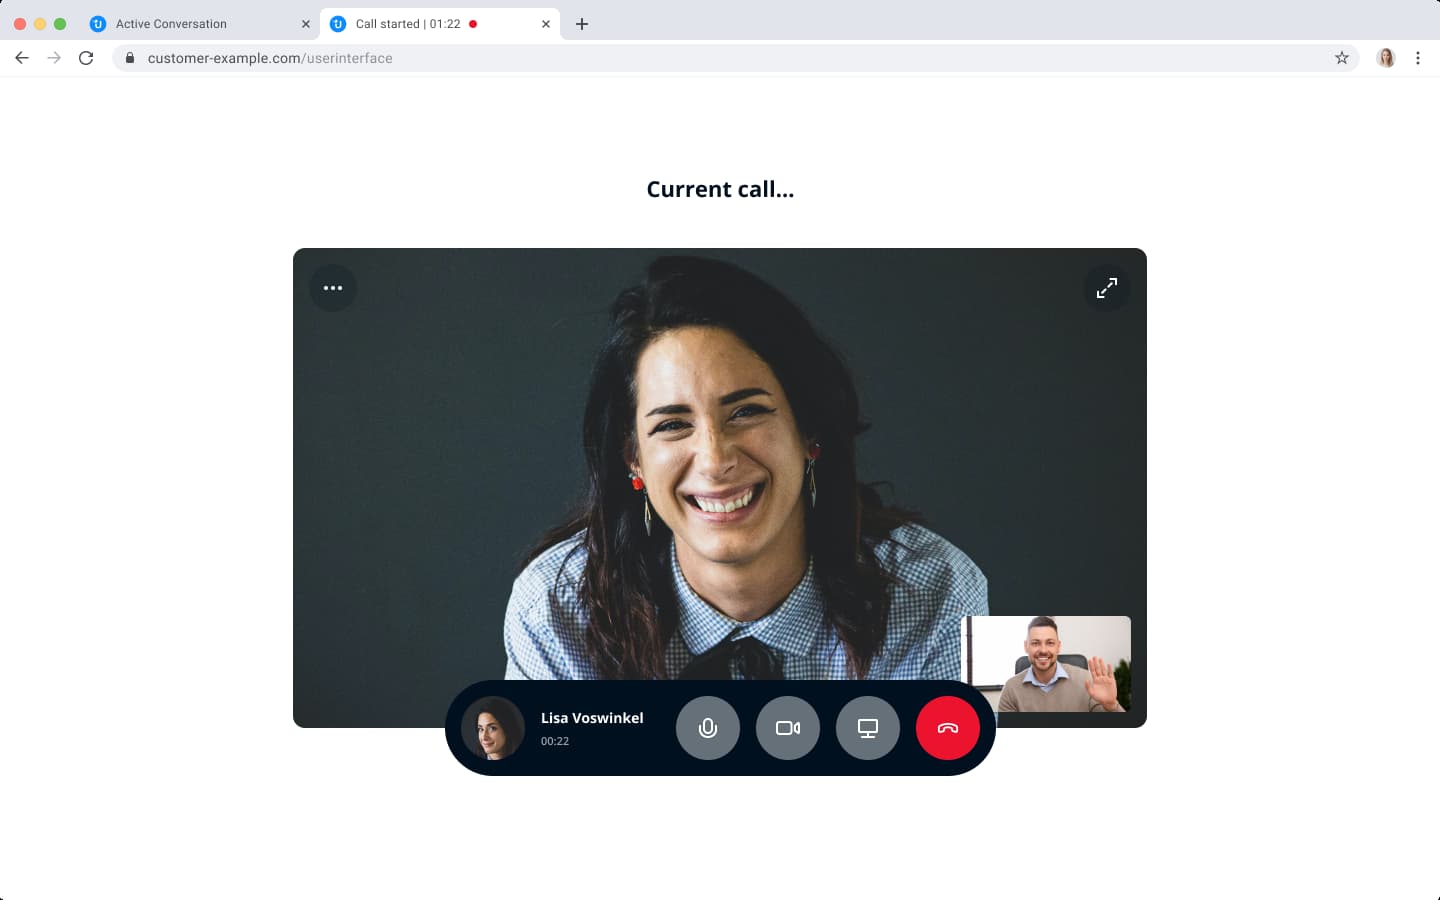
Once both sides have pushed the "Join call" button, you'll be connected and can start video calling!
2
Screen sharing
We've also introduced a complementary feature that is just as valuable as video calls: screen sharing.
While you’re in a call, either side can choose to share their screen by clicking on the monitor button (second from the left).

This is especially useful for digital support cases. If your contact is experiencing an issue on your website, they can simply share their screen for more clarification. Likewise, you can share your screen to explain something, like how to use a configurator. Show, don't tell!
3
The mobile experience

Userlike Calls also work well for customers on mobile devices. Again, accepting an audio call opens up a new tab for your contact.
By swiping left, your contact can easily navigate back to your website without losing the connection to your support agent.
However, smartphones –and especially iPhones– are protective of their battery life. So even though the customer can continue calling when they switch away from the tab, after a while the phone will put the Call tab on inactive and the connection will break. So it's for short excursions only.
Mobile users don't have the option to share their screen. They can, however, flip the direction of the camera. This can be helpful in many situations, like explaining what isn't working with the product they've just received.
4
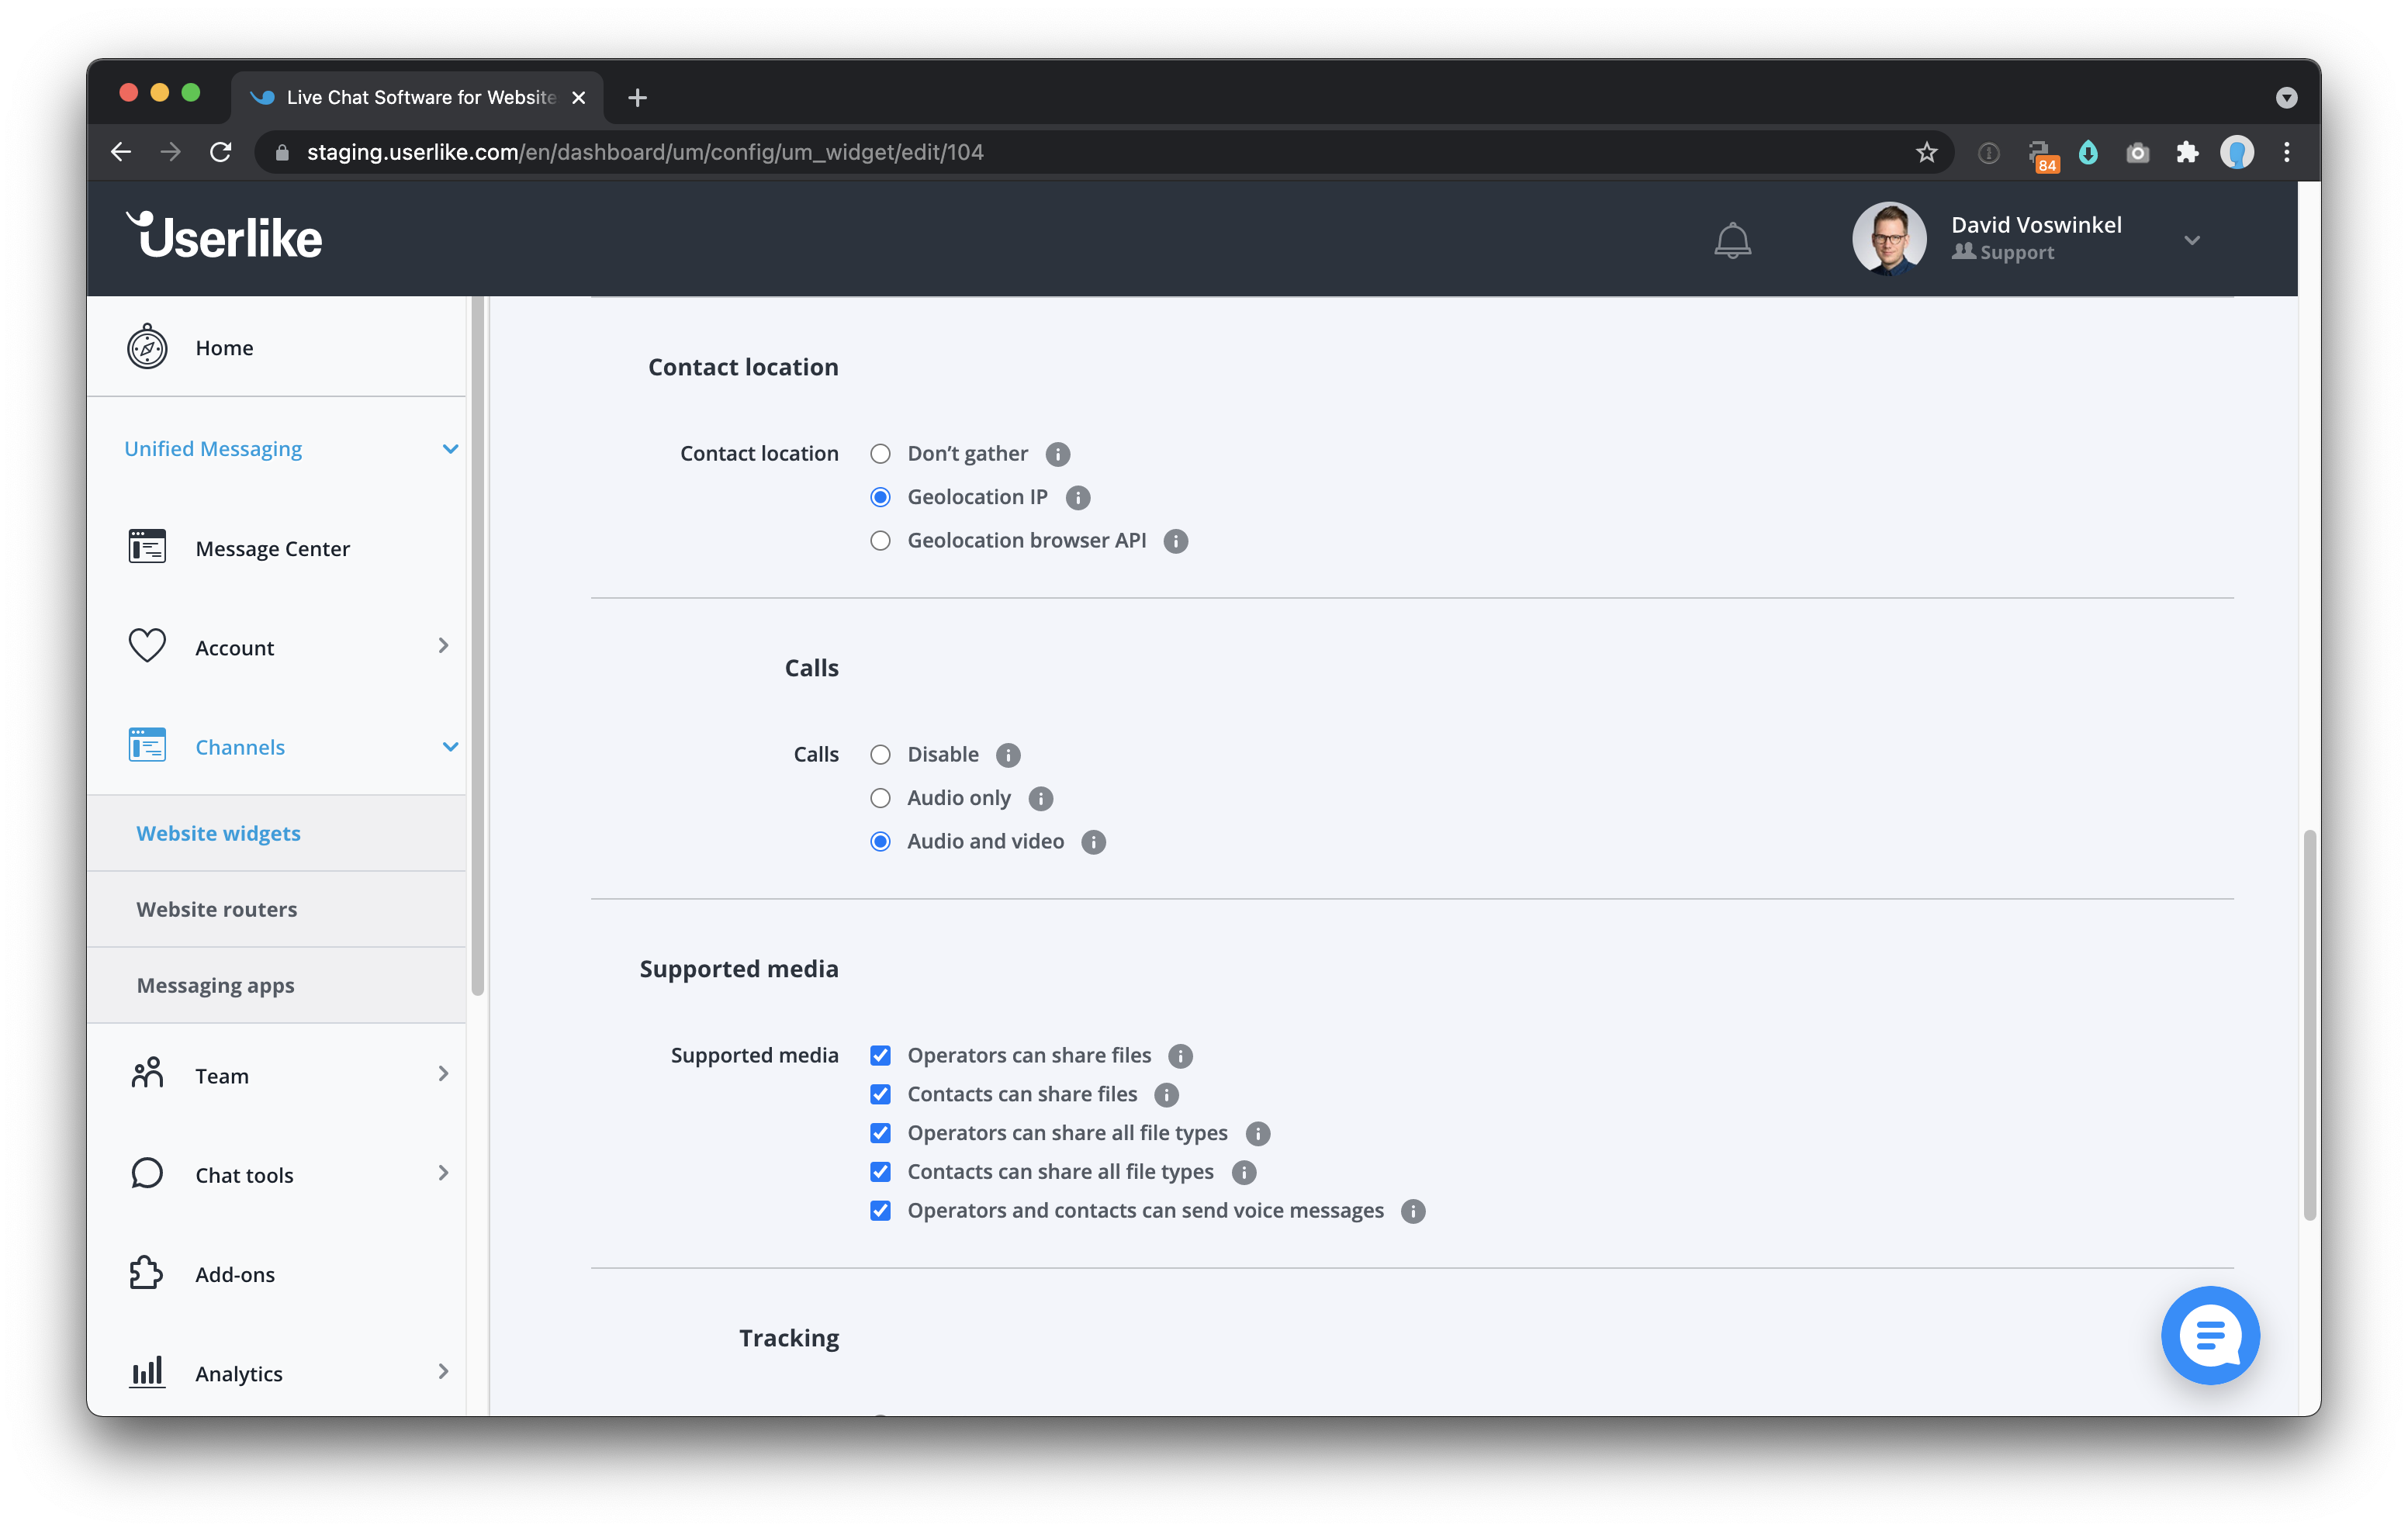
How to set it up
Calls are activated per Widget. In the Dashboard, go to Channels > Website Widgets and choose your Widget to enter its editor. In the Widget Editor, navigate to the Chat tab , and to Behavior .
There you find a section for Calls, where you can choose between disabling the feature entirely, only enabling it for audio (how we offered the feature so far), or activating video as well.
If you're on the Free or Team plan, you won’t have access to calls. If you still want to try it out, just reach out to our support team .
